Win10 Hyper-V VMs Benefit from More VRAM

I saw a fascinating article from long-time Windows maven Ed Bott this morning at ZDNet. It exhorts users to “Fine-tune memory usage” for best results when working with Hyper-V VMs. In that story, he vindicates a long-held belief of mine, based on repeated observation. That belief is that indeed, Win10 Hyper-V VMs benefit from more VRAM (virtual RAM) in their configurations. By default the Hyper-V Quick Create utility creates VMs with memory allocations of 2 GB. Bott suggests, and I concur, that this might be too little memory for at least some (if not most) VMs.
How Do Win10 Hyper-V VMs Benefit from More VRAM?
Mostly, they benefit with improved performance. Bott observes that the default allocation of 2GB “is not enough for acceptable performance.” My observations confirm this assertion when a VM is going to run demanding applications or heavy workloads. If the sole purpose of a VM is to familiarize yourself with and explore a new or preview Windows release, 2 GB is actually OK. Bott recommends that VMs be allocated about half of the physical RAM on their host PCs. Thus, he says a PC with 8 GB of physical RAM should have a minimum of 4GB VRAM for VMs, one with 16 GB gets 8 GB minimums, 32 GB gets 16 GB minimums, and so on. I think this may be overkill, but it will depend on what you’re going to do with those VMs. Certainly, it’s not incorrect to throw a bigger RAM allocation at a VM that’s lagging or dragging noticeably.
Memory allocation in Hyper-V is a min-max assignment: you set both values. On Hyper-V you use dynamic memory by default. This starts the VM at the minimum allocation, but adjusts upward as it needs it, until it hits the maximum. If dynamic memory isn’t enabled, Hyper-V allocates the amount shown in the RAM box at the top of the Memory setting pane and that’s that (no change in allocation occurs at runtime).
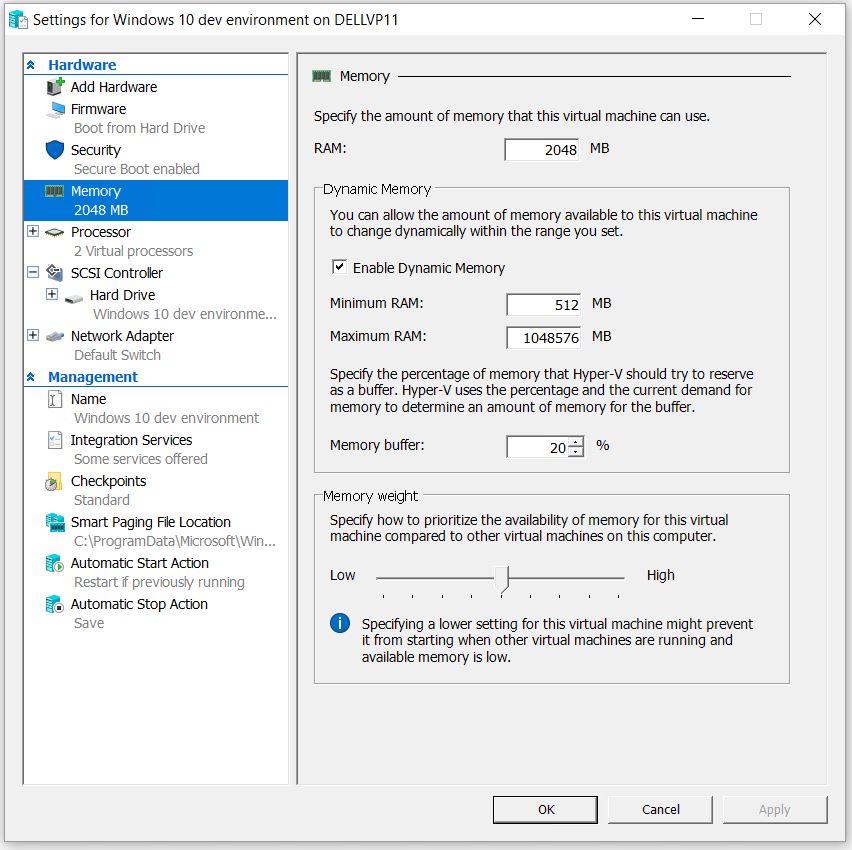
Dynamic Memory is enabled (checked) by default, though you can alter the min/max values as you see fit.
[Click image for full-sized view.]
More About Hyper-V Quick Create
I learned the hard way that it’s probably best to work from a local OS ISO image. In other words, build your VM from an image obtained using the Media Creation Tool, MSDN, or some other source. The Developer image that the tool makes available by default is 12.73 GB in size. This is much bigger than bare-bones OS images, because it includes Visual Studio and debugging tools galore. It takes some time to download, longer to verify the image, and still longer to extract the virtual hard disk. I spent several hours waiting for this process to complete to see what was involved. Suffice it to say that exercizing this capability makes an excellent CPU and I/O stress test for most PCs. Ouch!
All this said, Quick Create is a great tool and makes it simple, fast and easy to create new VMs. If you use your own ISOs or other local sources to build those VMs you won’t be subject to the delays that come along with using the Microsoft-supplied default.
[Note Added 6/23/2018: More Good Provisioning Info]
In response to this blog post and its impetus (Ed Bott’s ZDnet article), my good friend and business partner Kari Finn wrote a more nuanced post describing the ins and outs of provisioning Windows 10 VMs. He argues against leaving dynamic memory enabled and urges users to provide enough RAM in the static allocation to cover added needs for things like upgrading Windows itself and apps that need to run within the VM itself. He also digs into virtual CPU provisioning, a VM resource on par with memory for ensuring best performance. Check it out at: Hyper-V, Virtual RAM and Virtual CPUs over at Win10.Guru. Good stuff!