To streamline the move to Windows 10, IT can create a custom Windows 10 image to deliver all the applications and resources users require in one fell swoop.
As an IT professional, you can create a custom Windows 10 image to add all the specific features users need, such as certain apps in the Start menu. To avoid the need for user input, which can slow the process down, you can also automate aspects, such as skipping the End-User License Agreement (EULA) screen.
Follow these steps to build a customized image and streamline your Windows 10 migration.
1. Install Windows 10 on a technician machine
The first step to create a custom Windows 10 image is to install Windows 10 on a technician machine, which can be any PC or virtual machine (VM) you choose. You will use the technician machine to tailor the Windows 10 image to your users' needs and then deliver it to them.
If you decide to go the VM route, its disk layout can be a basic input/output system and Master Boot Record (MBR) or a Unified Extensible Firmware Interface (UEFI) with a globally unique identifier Partition Table (GPT). The technician machine is where you host custom themes, including the desktop background and screensaver.
When you install Windows 10 on the technician machine, you do not need to activate the OS. Windows 10 will restart in Audit Mode with the out-of-box experience (OOBE) and provide Windows 10's built-in administrator credentials.
2. Create an answer file to automate setup
Once you are logged in to the machine with admin credentials, you can use an answer file to skip the OOBE -- or welcome mode -- portion of the install process. Normally, OOBE is what a user would see when he first logs on to Windows 10. This mode generally requires user input, which can stand in the way of a fully automated Windows 10 installation.
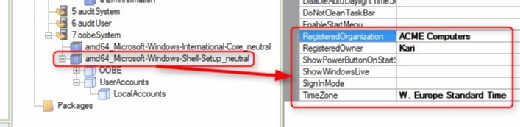
To skip the welcome mode, create a file called unattend.xml using Windows System Image Manager. Then, populate the file with the information it needs to bypass the welcome mode. This information includes details on the original equipment manufacturer for the device, the organization and the time zone the user will work in. Figure A shows information about the registered organization and registered user.
Include details about the registered organization and the registered owner of the device.
By default, Windows 10 will prompt users to create a Microsoft account and accept the EULA, both of which usually require user input. You can automate the user account portion by creating three general accounts -- admin, user and guest -- and adding them to the answer file. This way, the foundation for each user type is already in place. To skip the EULA, you must set HideEULAPage to True in the answer file.
On a UEFI-based PC, you must configure the hard disk to work with GPT partitioning. The partition for the image should match the standard size of a Windows system partition. The 64-bit version of Windows 10 requires 20 gigabytes of drive space, for example.
Designate any space on the disk that the other partitions don't consume to the OS partition.
GPT and MBR-partitioned Windows 10 disks have slightly different requirements. With GPT, the disk needs four partitions consisting of the Windows Recovery Environment, the EFI system, the Microsoft Reserved Partition and the OS itself.
With MBR, you only need two partitions, one for the System Reserved partition and one for the OS. Designate any space on the disk that the other partitions don't consume to the OS partition. Once you've set up the partitions, you can remove any components that the disk is not using.
In addition, you can make changes to File Explorer, including setting the application icon size, customizing the Start menu and adding favorites.
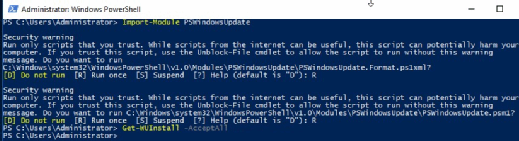
Use PowerShell to apply updates.
You can also use Sysprep to generalize the image. To do so, move all of the desktop, Start menu and File Explorer settings into a default user profile. This profile will serve as the foundation for all the other user profiles you create. It contains any relevant recent files and folders you need to include. Generalizing the image makes it hardware-independent.
IT admins can customize and capture a Windows 10 image using Sysprep.
The final step to create a custom Windows 10 image is to take a snapshot of the image, which then becomes an installable ISO file of the image itself that you can deliver to users.